Thursday, November 23, 2023

How To Fix Err_Connection_Timed_Out Error On Google Chrome

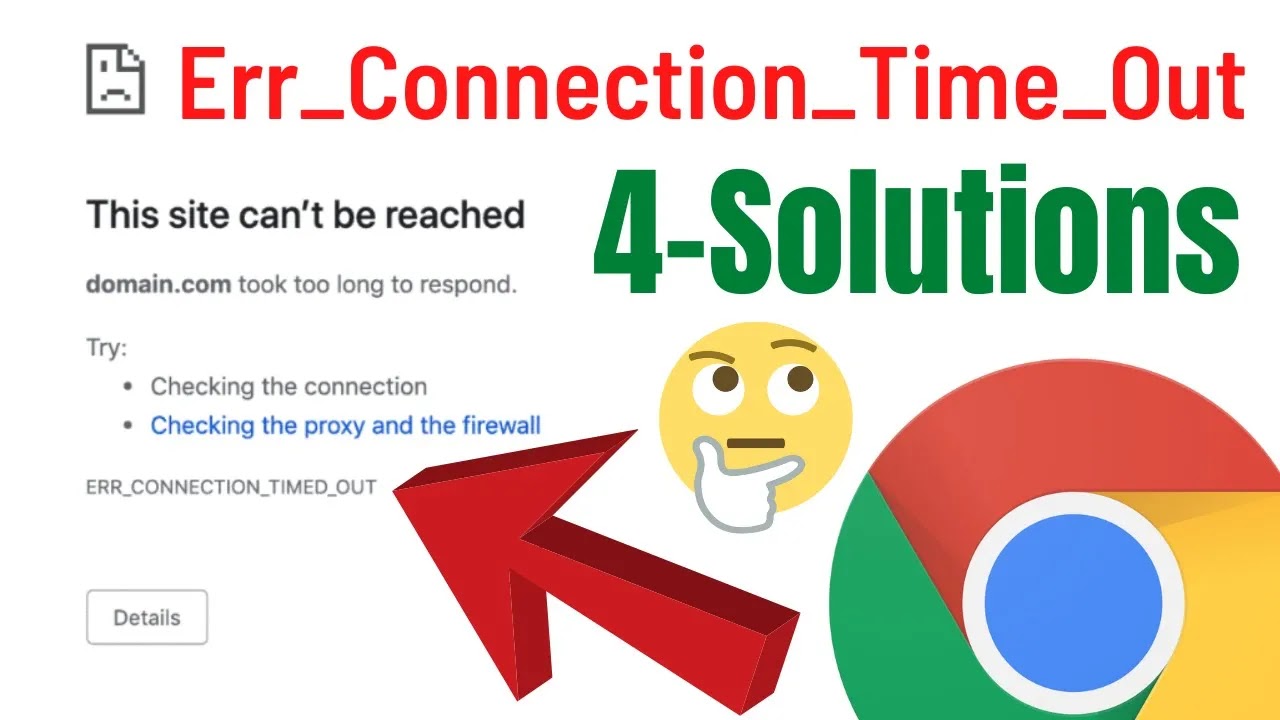
In this article, I will share 4 simple and working solutions through which you can fix this err connection timed out error in google chrome browser.


Solutions are following:

Fix 1 : Open Command Prompt as Admin.

Execute below mention commands one by one after pressing "Enter Key".

Command 1 : ipconfig /release

Command 2 : ipconfig /all

Command 3 : ipconfig /flushdns

Command 4 : ipconfig /renew

Command 5 : netsh int ip set dns

Command : netsh winsock reset

Once all commands executed, Then restart your PC or Laptop once.

Fix 2 : Change Proxy Server.

Right-click on your Active Internet Connection & then click on "Properties".

Select "Internet Protocol Version 4" & then click on "Properties" button.

Tick the "Use the following DNS Server Addresses" box...

> Preferred DNS Server : 8.8.8.8

> Alternate DNS Server : 8.8.4.4

Tick the validate box and then click on "OK" Button to save the changes.

Fix 3 : Clear all Browsing Data of Chrome.

Goto Chrome's History.

Click on "Clear Browsing Data".

Tick all the box-es and then click on "Clear Data". This will clear your all chrome browsing data.

Fix 4 : Add any VPN Extension to Chrome Browser.

Search for "browsec" & Add that extension to chrome browser.

Enable it and then try to open site that prompting you err_timed_out error.

> Note: If these all solutions did not work for you then try to "Turn-Off" your Router and then "Turn-On" it again.

Watch Video Tutorial


Wednesday, November 22, 2023

How To Clear RAM Cache Memory Windows 10 | Fix RAM Cached Memory Too High Problem (Easy Way)

What is RAM Cache? 

RAM cache, also known as cache memory or simply cache, refers to a type of high-speed volatile computer memory that provides high-speed data access to a processor and stores frequently used computer programs, applications, and data. It is a crucial component in a computer's architecture and is faster than the main system memory (RAM).


I am going to share number of ways through which you can clear or boost your computer speed and performance. They are following.

Step 1: Open Command Prompt (CMD) as a Administrator.

> After that type command "ipconfig /flushdns" and then press "Enter Key" to execute that command.

Step 2: Disable all Un-wanted Start-up Programs or Apps from Task Manager.

> Open "Task Manager", Go to "Startup" tab and then disable all the un-wanted programs from the windows startup.

Step 3: Uninstall all Un-wanted Apps and Programs from your PC or Laptop.

> Open "Control Panel", Click on "Program" and then click on "Uninstall a Program".

> Here it shows you all the program which are install on your PC or Laptop. Just uninstall all the un-wanted programs from your computer.

Step 4 : Set "Virtual Memory".

I recommended you to put recommended paging size to custom size box...

You can also do the same with other hard drives to extend the size of your RAM by increasing Virtual Memory Size in each hard drive.

That's it, I hope these 4 steps really help you to clear RAM Cache Memory and Boost your RAM Speed & Performance of your PC and Laptop.

Watch Video Tutorial: CLICK HERE


Tuesday, November 21, 2023

How To Fix Windows 10 Settings App Not Opening Or Crashing Problem (Simple & Quick Tutorial)


If the Windows 10 Settings app is not opening or crashing, there are several potential solutions you can try. There are few ways through which you can solve this problem, They are following:


1. Restart Your Computer/Laptop:

In most case's, a simple restart or reboot can fix this type of glitches and windows issues.

2. Run Windows Update:

Make sure that your operating system or windows is up-to-dated.

Press Windows key + I to open Settings.

Go to "Update & Security" and then click on "Windows Update."

Click on "Check for updates" and install any available updates.

3. Use the Windows Store Apps Troubleshooter:

Windows has built-in troubleshooters that can automatically fix common problems.

Open Settings (Windows key + I).

Go to "Update & Security" and then click on "Troubleshoot."

Scroll down and find "Windows Store Apps," then run the troubleshooter.

4. Reset the Settings App:

You can try resetting the Settings app to its default state.

Open Settings (Windows key + I).

Go to "Apps" and then click on "Apps & features."

Find "Settings" in the list, click on it, and select "Advanced options."

Click on the "Reset" button.

5. Check for Corrupted System Files:

The built-in System File Checker (SFC) tool can scan and repair corrupted windows system files.

Open Command Prompt as an administrator (right-click on the Start button and select "Command Prompt (Admin)").

Type "sfc /scannow" and press Enter. Let the scan complete.

6. Use DISM Tool:

The Deployment Image Service and Management Tool (DISM) can be used to fix Windows corruption errors.

Open Command Prompt as an administrator.

Type DISM /Online /Cleanup-Image /RestoreHealth and press Enter. Allow the process to complete.

7. Reinstall the Settings App:

While you can't reinstall the Settings app directly, you can try to reinstall all built-in apps.

Open PowerShell as an administrator.

Type: Get-AppXPackage -AllUsers | Foreach {Add-AppxPackage -DisableDevelopmentMode -Register "$($_.InstallLocation)\AppXManifest.xml"} and press Enter.

If the 1st command does not work then try the 2nd command.

Get-AppXPackage -AllUsers -Name windows.immersivecontrolpanel | Foreach {Add-AppxPackage -DisableDevelopmentMode -Register “$($_.InstallLocation)\AppXManifest.xml” -Verbose}

and then press "Enter Key", Wait till command executed successfully and then restart your pc/laptop once.

After trying these solutions, check if the Windows 10 Settings app is working properly. If the problem persists, you may need to consider more advanced troubleshooting or seek assistance from Microsoft support.


Watch Video Tutorial: